
why is my water heater not draining
Causes, solutions and when to call a professional
Expert Answer
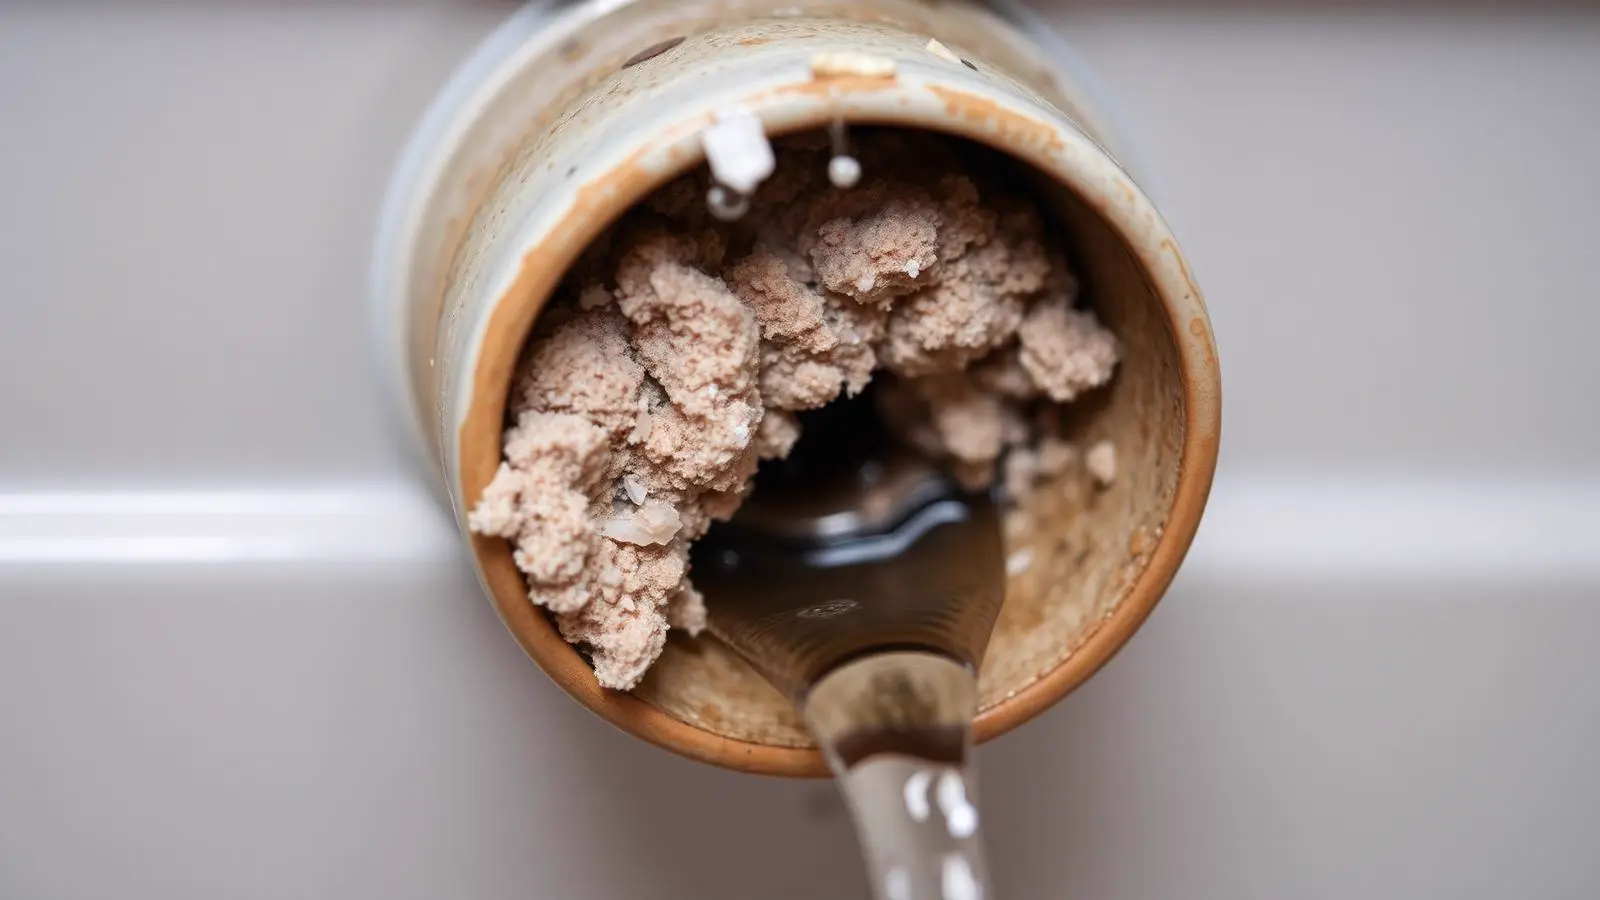
A water heater that won't drain at all is almost always sediment packed solid against the drain valve opening, a missing vacuum break preventing airflow, or the cold-water inlet valve left closed. Opening a hot tap upstairs to admit air usually gets flow started.
How Serious Is This?
Usually Manageable
Monitor it and run the safe checks below before spending money.
This is the level for this problem: Usually safe to investigate.
Inspection Recommended
Have a professional look at it soon to prevent damage or failure.
Potentially Serious
Stop using the appliance and get professional help right away.
Safety warning
Let the tank cool for at least an hour before draining — water inside can be scalding, and on a gas unit, set the gas control to PILOT (not off) to avoid extinguishing it unnecessarily during a routine flush.
Most Likely Causes
- 1Sediment packed solid against the drain valve opening
- 2No vacuum break — nothing admitting air to the tank
- 3Cold-water inlet valve still fully closed with no bypass
- 4Plastic drain valve seat warped or clogged internally
Safe Homeowner Checks
With the valve open and a hose attached, briefly and carefully insert a stiff wire (like an unbent coat hanger, sold as a 'drain valve poker') a few inches into the open valve to break up the clog at the opening.
Takes: 8 min · Tools: Stiff wire or dedicated drain-valve poker tool, Garden hose, Bucket
With the valve open and a hose attached, briefly and carefully insert a stiff wire (like an unbent coat hanger, sold as a 'drain valve poker') a few inches into the open valve to break up the clog at the opening.
Expect: Water begins flowing, often as a rush of rust-colored water and grit once the clog breaks.
What it means: Flow starting confirms sediment was the blockage; still nothing after several attempts suggests the clog is deeper than the valve reaches.
Next step: Let it drain fully, then briefly open the cold inlet with the drain still open to flush remaining sediment before closing up.
Confirm the tank has cooled — sediment breaking loose can release a burst of very hot water.
With the drain valve still open, go to a hot-water tap on the highest floor of the house and open it fully to admit air into the system.
Takes: 2 min · Tools: None
With the drain valve still open, go to a hot-water tap on the highest floor of the house and open it fully to admit air into the system.
Expect: Flow at the drain valve resumes or picks up noticeably within a few seconds.
What it means: Flow resuming confirms the tank simply needed an air path, not a mechanical repair.
Next step: Keep the upstairs hot tap open for the entire duration of the drain and flush.
Locate the cold-water inlet valve directly above the tank and check its physical position — a gate valve handle should be fully perpendicular when closed, a ball valve lever should be crosswise to the pipe.
Takes: 3 min · Tools: Flashlight
Locate the cold-water inlet valve directly above the tank and check its physical position — a gate valve handle should be fully perpendicular when closed, a ball valve lever should be crosswise to the pipe.
Expect: The valve's physical position clearly matches open or closed.
What it means: A handle that spins freely without visibly moving the internal stem indicates a broken valve, not user error.
Next step: If the valve is genuinely stuck or broken, that valve — not the drain valve — needs replacement.
With the tank's water supply isolated (cold inlet closed), unscrew the plastic drain valve entirely using channel-lock pliers and inspect its internal gate and the tank's boss opening directly.
Takes: 10 min · Tools: Channel-lock pliers, Bucket, Towels
With the tank's water supply isolated (cold inlet closed), unscrew the plastic drain valve entirely using channel-lock pliers and inspect its internal gate and the tank's boss opening directly.
Expect: Water flows freely once the valve itself is removed from the tank.
What it means: Free flow with the valve removed confirms the valve body itself was the blockage, not the tank opening.
Next step: Install a brass ball-valve replacement, which resists warping and clogging far better than the original plastic.
Have a bucket and towels ready — removing the valve fully will release the remaining tank water at once.
Need Help With a Water Heater Not draining?
A qualified licensed plumber can confirm the cause on site, check the safety controls, and quote the repair before the problem gets more expensive.
Fast Request • Local Matching • No Obligation
Annual flushing is one of the few maintenance tasks that meaningfully extends a tank's life, but the drain valve is also the single most complained-about part on residential water heaters. When absolutely nothing comes out — not even a trickle — the cause is almost always physical: something is blocking the path, or there's no air able to enter the tank to replace the water leaving it. Work through these in order before assuming the valve is broken.
Every likely cause, ranked
- #1
Sediment packed solid against the drain valve opening
Most common causeSediment — a mix of calcium and magnesium scale, and rust — settles at the very bottom of the tank, which is exactly where the drain valve opening sits. On tanks that have never been flushed, this layer can harden into a compacted crust that fully blocks the valve opening from the inside.
It's the most common cause of a complete blockage, especially on a first-ever flush of a tank more than 3–5 years old on hard water.
Exact symptoms
- Valve is open (handle turned or lever pulled) but absolutely nothing comes out
- Tank has never been flushed, or not in several years
- Popping or rumbling noises have been noticed during heating cycles (a sign of heavy sediment)
Self-test (8 min) — tools: Stiff wire or dedicated drain-valve poker tool, Garden hose, Bucket
With the valve open and a hose attached, briefly and carefully insert a stiff wire (like an unbent coat hanger, sold as a 'drain valve poker') a few inches into the open valve to break up the clog at the opening.
Expect: Water begins flowing, often as a rush of rust-colored water and grit once the clog breaks.
What it means: Flow starting confirms sediment was the blockage; still nothing after several attempts suggests the clog is deeper than the valve reaches.
Next step: Let it drain fully, then briefly open the cold inlet with the drain still open to flush remaining sediment before closing up.
Confirm the tank has cooled — sediment breaking loose can release a burst of very hot water.
DIY-eligible · DIY $8–$15 for a poker tool · Pro $150–$300 for a professional flush and descale · 30–60 minutes
- #2
No vacuum break — nothing admitting air to the tank
Water can't drain from a sealed tank without air entering somewhere to replace it, the same reason a finger over a straw's top stops liquid from falling. If the cold-water inlet valve is fully closed and no hot tap is open anywhere in the house, the tank is essentially sealed and gravity alone can't pull water past the drain valve.
It's an extremely common mistake during a DIY flush — closing the cold inlet is correct, but forgetting to open a hot tap elsewhere means no air can enter to replace draining water.
Exact symptoms
- A trickle starts, then flow slows to a stop within seconds
- Cold-water inlet valve was closed before starting to drain (correct step, but incomplete)
- No faucet anywhere in the house is currently open
Self-test (2 min) — tools: None
With the drain valve still open, go to a hot-water tap on the highest floor of the house and open it fully to admit air into the system.
Expect: Flow at the drain valve resumes or picks up noticeably within a few seconds.
What it means: Flow resuming confirms the tank simply needed an air path, not a mechanical repair.
Next step: Keep the upstairs hot tap open for the entire duration of the drain and flush.
DIY-eligible · DIY $0 · Pro Not applicable · Immediate
- #3
Cold-water inlet valve still fully closed with no bypass
Some homeowners shut the cold inlet valve completely to stop refilling the tank during a flush, which is correct, but if that same valve is the only place air or replacement water can get in and it's fully closed with all other taps also closed, the system has no way to equalize and flow will stop almost immediately.
It overlaps closely with the vacuum-break issue above but is worth checking separately because occasionally the inlet valve itself is the one that's stuck or was never actually closed, leading to confusion about why nothing changes when a hot tap is opened.
Exact symptoms
- No flow at all, even after opening an upstairs hot tap
- Uncertain whether the cold inlet valve is actually open or closed
- Valve handle turns freely without resistance (possible sign of a broken/spinning valve stem)
Self-test (3 min) — tools: Flashlight
Locate the cold-water inlet valve directly above the tank and check its physical position — a gate valve handle should be fully perpendicular when closed, a ball valve lever should be crosswise to the pipe.
Expect: The valve's physical position clearly matches open or closed.
What it means: A handle that spins freely without visibly moving the internal stem indicates a broken valve, not user error.
Next step: If the valve is genuinely stuck or broken, that valve — not the drain valve — needs replacement.
DIY-eligible · DIY $0 to inspect; $15–$40 to replace a gate or ball valve · Pro $150–$275 · 20–45 minutes
- #4
Plastic drain valve seat warped or clogged internally
Standard plastic drain valves have a small internal gate that can warp from repeated heat exposure or become permanently jammed by sediment lodged inside the valve body itself, rather than at the tank opening. Unlike surface sediment, this blockage sits inside the valve and can't be cleared with a poker tool from outside.
It's the most likely explanation once sediment-at-the-opening and airflow have both been ruled out, particularly on original plastic valves that have never been replaced.
Exact symptoms
- A poker tool goes in but hits resistance immediately and can't be worked further
- Valve was fine on a previous flush but has gradually slowed and now stopped
- Valve body itself feels warped, discolored, or brittle to the touch
Self-test (10 min) — tools: Channel-lock pliers, Bucket, Towels
With the tank's water supply isolated (cold inlet closed), unscrew the plastic drain valve entirely using channel-lock pliers and inspect its internal gate and the tank's boss opening directly.
Expect: Water flows freely once the valve itself is removed from the tank.
What it means: Free flow with the valve removed confirms the valve body itself was the blockage, not the tank opening.
Next step: Install a brass ball-valve replacement, which resists warping and clogging far better than the original plastic.
Have a bucket and towels ready — removing the valve fully will release the remaining tank water at once.
DIY-eligible · DIY $20–$35 for a brass replacement valve · Pro $150–$250 · 45 minutes
Symptom-to-cause table
Match what you can see, hear or smell to the cause it points at, and the safe next step for that reading.
Valve is open (handle turned or lever pulled) but absolutely nothing comes out
Likely cause: Sediment packed solid against the drain valve opening
Who should handle it: Homeowner, then licensed plumber
Next step: Let it drain fully, then briefly open the cold inlet with the drain still open to flush remaining sediment before closing up.
A trickle starts, then flow slows to a stop within seconds
Likely cause: No vacuum break — nothing admitting air to the tank
Who should handle it: Homeowner, then licensed plumber
Next step: Keep the upstairs hot tap open for the entire duration of the drain and flush.
No flow at all, even after opening an upstairs hot tap
Likely cause: Cold-water inlet valve still fully closed with no bypass
Who should handle it: Homeowner, then licensed plumber
Next step: If the valve is genuinely stuck or broken, that valve — not the drain valve — needs replacement.
A poker tool goes in but hits resistance immediately and can't be worked further
Likely cause: Plastic drain valve seat warped or clogged internally
Who should handle it: Homeowner, then licensed plumber
Next step: Install a brass ball-valve replacement, which resists warping and clogging far better than the original plastic.
Ten-minute homeowner checklist
- With the valve open and a hose attached, briefly and carefully insert a stiff wire (like an unbent coat hanger, sold as a 'drain valve poker') a few inches into the open valve to break up the clog at the opening. (8 min · Stiff wire or dedicated drain-valve poker tool, Garden hose, Bucket)Confirm the tank has cooled — sediment breaking loose can release a burst of very hot water.
- With the drain valve still open, go to a hot-water tap on the highest floor of the house and open it fully to admit air into the system. (2 min · None)
- Locate the cold-water inlet valve directly above the tank and check its physical position — a gate valve handle should be fully perpendicular when closed, a ball valve lever should be crosswise to the pipe. (3 min · Flashlight)
- With the tank's water supply isolated (cold inlet closed), unscrew the plastic drain valve entirely using channel-lock pliers and inspect its internal gate and the tank's boss opening directly. (10 min · Channel-lock pliers, Bucket, Towels)Have a bucket and towels ready — removing the valve fully will release the remaining tank water at once.
Never open an electrical panel, relight a burner you can smell gas near, or drain a tank that is scalding hot. Stop and call a licensed plumber instead.
What this costs to fix
| Cause | DIY cost | Professional cost | Typical time | Who should repair |
|---|---|---|---|---|
| Sediment packed against the drain valve opening | $8–$15 | $150–$300 | 30–60 minutes | Homeowner or licensed plumber |
| No vacuum break admitting air | $0 | Not applicable | Immediate | Homeowner |
| Cold inlet valve closed or broken | $0–$40 | $150–$275 | 20–45 minutes | Homeowner or licensed plumber |
| Plastic drain valve warped or clogged internally | $20–$35 | $150–$250 | 45 minutes | Homeowner or licensed plumber |
Sediment packed against the drain valve opening
DIY cost: $8–$15
Professional cost: $150–$300
Typical time: 30–60 minutes
Who should repair: Homeowner or licensed plumber
No vacuum break admitting air
DIY cost: $0
Professional cost: Not applicable
Typical time: Immediate
Who should repair: Homeowner
Cold inlet valve closed or broken
DIY cost: $0–$40
Professional cost: $150–$275
Typical time: 20–45 minutes
Who should repair: Homeowner or licensed plumber
Plastic drain valve warped or clogged internally
DIY cost: $20–$35
Professional cost: $150–$250
Typical time: 45 minutes
Who should repair: Homeowner or licensed plumber
Possible solutions you can do safely
- Always open an upstairs hot tap before and during a drain to admit air.
- Use a stiff wire or drain-valve poker tool to break up sediment right at the valve opening.
- Replace an original plastic drain valve with a brass ball valve during your next flush.
- Flush annually to keep sediment from compacting into a hard, hard-to-clear layer.
Fixes that usually waste money
- Replacing the entire water heater when a $10 poker tool or an open hot tap solves the problem.
- Repeatedly forcing the drain valve handle, which can snap a brittle plastic valve off at the tank.
- Assuming the tank is defective without first checking whether any faucet in the house is open for airflow.
When to Call a Professional
- Removing the drain valve reveals no flow at all, suggesting a blockage deep inside the tank.
- The cold-water inlet valve is stuck, broken, or spins without actuating the internal stem.
- Sediment is so severe that annual flushing no longer restores full flow.
- The tank is old enough that a plumber should assess whether a flush is still worthwhile versus replacement.
Related Home Problems
These water heater symptoms often show up with the one on this page.
why is my water heater draining so slow
Points at the same part of the system — both problems involve the sediment.
Efficiency, Costs & Maintenance Usually safe to investigate
why is my water heater leaking from the drain valve
Points at the same part of the system — both problems involve the sediment.
Leaks & Water Pressure Usually safe to investigate
why is my water heater not heating
Points at the same part of the system — both problems involve the heating.
No Hot Water & Temperature Repair soon
why is my water heater making a popping noise
Points at the same part of the system — both problems involve the heating.
Noises Repair soon
why is my water heater popping
Points at the same part of the system — both problems involve the sediment.
Noises Repair soon
Still not sure what you are hearing or seeing? Browse the efficiency, costs & maintenance guides or the full water heater guide index with repair-cost ranges.
Frequently Asked Questions
Why won't anything come out when I open the drain valve?
The most common cause is hardened sediment blocking the valve opening from inside the tank. The second most common cause is simply not opening a hot-water tap elsewhere in the house, which is needed to let air into the tank so water can flow out.
Do I need to open a faucet to drain a water heater?
Yes. Open a hot-water tap on an upper floor before and during the drain. Without an air path into the tank, the water inside creates a vacuum that stops flow almost immediately, even with the drain valve fully open.
How do I unclog a water heater drain valve?
Insert a stiff wire or a dedicated drain-valve poker tool a few inches into the open valve to break up compacted sediment. If that doesn't work, the valve itself may need to be unscrewed and inspected, or replaced with a brass ball valve.
Should I replace the plastic drain valve with a brass one?
Yes, it's a worthwhile upgrade during any flush. Brass ball valves resist warping and internal clogging far better than the standard plastic valves most tanks ship with, and cost only $20–$35 in parts.
Sources
- U.S. Department of Energy — Water Heater Maintenance — Draining and Flushing
- International Code Council — International Plumbing Code, Section 606 — Valve Requirements
Ready to get this fixed?
Tell us your ZIP code and what the heater is doing. We match your request to a local licensed plumber.
Fast Request • Local Matching • No Obligation
Published 2026-08-10 · Last reviewed 2026-08-10 · Reviewed by Why Is My Water Heater? editorial team · How we research