
why is my water heater leaking from the top
Causes, solutions and when to call a professional
Expert Answer
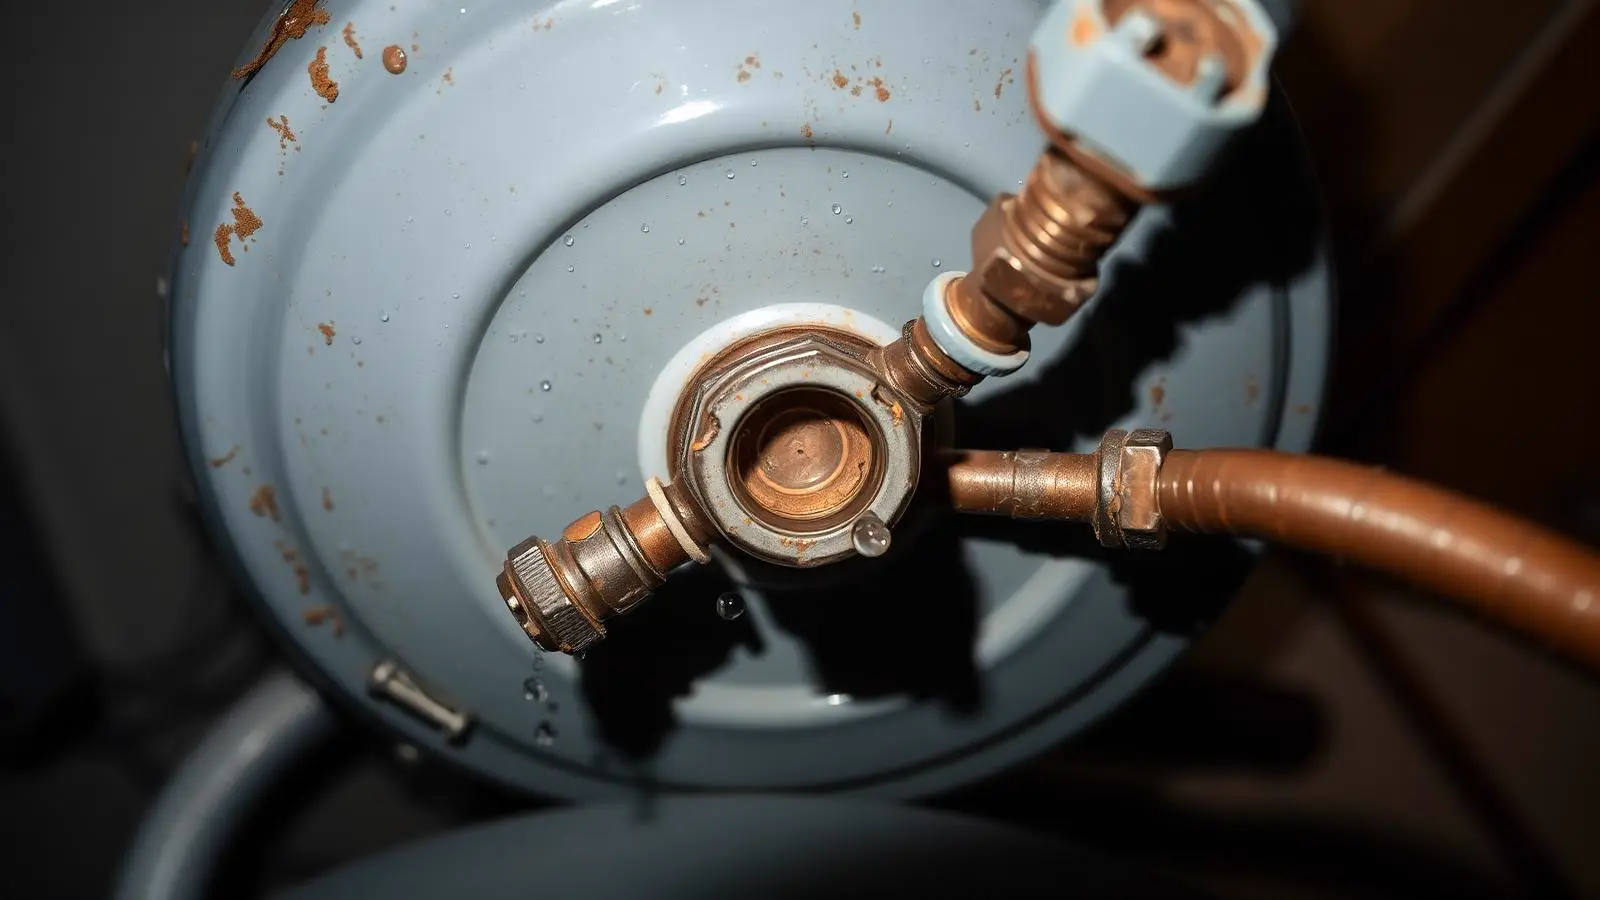
Leaks from the top of a water heater almost always come from the cold/hot nipple fittings, the anode rod access port, or the temperature and pressure relief valve body — all repairable connection issues, not tank failure.
How Serious Is This?
Usually Manageable
Monitor it and run the safe checks below before spending money.
Inspection Recommended
Have a professional look at it soon to prevent damage or failure.
This is the level for this problem: Repair soon.
Potentially Serious
Stop using the appliance and get professional help right away.
Safety warning
If the top of an electric unit is wet near the upper thermostat access panel, shut off power at the breaker before inspecting further.
Most Likely Causes
- 1Loose or corroded hot/cold nipple fittings
- 2Anode rod port leaking
- 3T&P relief valve body or threads leaking
- 4Cracked upper access panel gasket (electric units)
Safe Homeowner Checks
Dry both nipple fittings, wrap a folded paper towel around each, run a hot tap for two minutes, and inspect.
Takes: 6 min · Tools: Towel, Paper towel
Dry both nipple fittings, wrap a folded paper towel around each, run a hot tap for two minutes, and inspect.
Expect: Dry paper on a sound fitting, wet within seconds on the failing one.
What it means: Pinpoints exactly which nipple connection is leaking.
Next step: Tighten a quarter turn using two wrenches — one backing up the tank nipple itself.
Overtightening can crack the nipple where it threads into the tank top.
Dry around the anode hex bolt completely, watch for 10 minutes without running water, then run hot water for two minutes and recheck.
Takes: 10 min · Tools: Towel, Flashlight
Dry around the anode hex bolt completely, watch for 10 minutes without running water, then run hot water for two minutes and recheck.
Expect: Dry around the bolt at rest and after hot-water use if the seal is intact.
What it means: Moisture pooling at the hex head confirms the anode seal is the source.
Next step: Remove the rod, re-tape the threads with pipe thread sealant rated for potable water, and retorque.
Dry the valve body and surrounding tank surface, place a dry cloth beneath the valve, and check after 15 minutes without touching the test lever.
Takes: 10 min · Tools: Towel, Cloth
Dry the valve body and surrounding tank surface, place a dry cloth beneath the valve, and check after 15 minutes without touching the test lever.
Expect: A sound valve stays dry at rest with no lever activity.
What it means: Ongoing dampness at rest (not from discharge) means the valve itself has failed and needs replacement, independent of house pressure.
Next step: Replace the T&P valve; do not attempt to reseal or tighten it beyond hand-plus-a-turn.
Never disable or cap a T&P valve, even a leaking one — replace it instead.
With power off at the breaker, remove the upper panel, dry the insulation and gasket, reinstall, then run a hot cycle and check for renewed dampness.
Takes: 10 min · Tools: Screwdriver, Towel
With power off at the breaker, remove the upper panel, dry the insulation and gasket, reinstall, then run a hot cycle and check for renewed dampness.
Expect: No dampness reappears around the panel after a full heating cycle.
What it means: Renewed dampness confined to the panel area indicates poor sealing, not a tank leak.
Next step: Reseat the gasket and panel; if the true source is a nipple or valve, address that instead.
Always shut off power at the breaker before removing an access panel.
A leak at the top of the tank is good news relative to a bottom leak: the top holds only threaded connections and access ports, none of which require replacing the whole unit. This page ranks the top-specific sources in the order they actually occur.
Every likely cause, ranked
- #1
Loose or corroded hot/cold nipple fittings
Most common causeThe dip tube (cold inlet) and hot outlet nipples thread directly into the top of the tank. Repeated thermal expansion loosens the union nuts over years, and galvanic corrosion between copper and steel eats through the joint.
These are the two connections every tank has, under constant thermal stress, making them the single most common top-leak source.
Exact symptoms
- Water trail down one side of the tank from a specific nipple
- Green or white corrosion crust visible at the fitting
- Leak appears or worsens right after hot water is drawn
Self-test (6 min) — tools: Towel, Paper towel
Dry both nipple fittings, wrap a folded paper towel around each, run a hot tap for two minutes, and inspect.
Expect: Dry paper on a sound fitting, wet within seconds on the failing one.
What it means: Pinpoints exactly which nipple connection is leaking.
Next step: Tighten a quarter turn using two wrenches — one backing up the tank nipple itself.
Overtightening can crack the nipple where it threads into the tank top.
DIY-eligible · DIY $12–$45 for a flex connector or dielectric union · Pro $150–$300 · 30–60 minutes
- #2
Anode rod port leaking
The anode rod threads into a dedicated port at the top of the tank, sealed with pipe thread or a factory gasket. If it was disturbed during a rod replacement, or the seal has simply aged, water weeps around the hex head.
It's common on tanks that have had the anode inspected or replaced, or where the factory seal has degraded over 6+ years.
Exact symptoms
- Water localized right at the anode hex head, usually near the center of the tank top
- Started after a recent maintenance visit or DIY anode check
Self-test (10 min) — tools: Towel, Flashlight
Dry around the anode hex bolt completely, watch for 10 minutes without running water, then run hot water for two minutes and recheck.
Expect: Dry around the bolt at rest and after hot-water use if the seal is intact.
What it means: Moisture pooling at the hex head confirms the anode seal is the source.
Next step: Remove the rod, re-tape the threads with pipe thread sealant rated for potable water, and retorque.
DIY-eligible · DIY $15–$40 for a new anode rod and thread sealant · Pro $120–$220 · 45–75 minutes
- #3
T&P relief valve body or threads leaking
The T&P valve threads into the top or upper side of the tank. Beyond discharging correctly under pressure, the valve's own body threads or internal seal can degrade with age and weep independent of any pressure event.
Valves are typically rated for 6–10 years of reliable sealing; past that, mineral buildup on the seat prevents a full reseal after every minor pressure fluctuation.
Exact symptoms
- Continuous slow drip from the valve body itself, not just the discharge tube outlet
- Moisture at the threads where the valve enters the tank
- No large pressure spike recorded, yet the valve still weeps
Self-test (10 min) — tools: Towel, Cloth
Dry the valve body and surrounding tank surface, place a dry cloth beneath the valve, and check after 15 minutes without touching the test lever.
Expect: A sound valve stays dry at rest with no lever activity.
What it means: Ongoing dampness at rest (not from discharge) means the valve itself has failed and needs replacement, independent of house pressure.
Next step: Replace the T&P valve; do not attempt to reseal or tighten it beyond hand-plus-a-turn.
Never disable or cap a T&P valve, even a leaking one — replace it instead.
Professional repair · DIY $15–$25 for the part if a licensed pro supervises · Pro $150–$300 · 45–60 minutes
- #4
Cracked upper access panel gasket (electric units)
On electric water heaters, condensation or a splash near the upper thermostat access panel can be mistaken for a tank leak when it's actually surface moisture entering through a loose or missing insulation gasket.
Less common than fitting or valve leaks, but worth ruling out on electric units where the panel was recently removed for element service.
Exact symptoms
- Dampness confined to the area around the upper access panel screws
- No wetness at nipples, anode port, or T&P valve
- Panel was recently opened for thermostat or element work
Self-test (10 min) — tools: Screwdriver, Towel
With power off at the breaker, remove the upper panel, dry the insulation and gasket, reinstall, then run a hot cycle and check for renewed dampness.
Expect: No dampness reappears around the panel after a full heating cycle.
What it means: Renewed dampness confined to the panel area indicates poor sealing, not a tank leak.
Next step: Reseat the gasket and panel; if the true source is a nipple or valve, address that instead.
Always shut off power at the breaker before removing an access panel.
DIY-eligible · DIY $5–$15 · Pro $100–$180 · 20–30 minutes
Symptom-to-cause table
Match what you can see, hear or smell to the cause it points at, and the safe next step for that reading.
Water trail down one side of the tank from a specific nipple
Likely cause: Loose or corroded hot/cold nipple fittings
Who should handle it: Homeowner, then licensed plumber
Next step: Tighten a quarter turn using two wrenches — one backing up the tank nipple itself.
Water localized right at the anode hex head, usually near the center of the tank top
Likely cause: Anode rod port leaking
Who should handle it: Homeowner, then licensed plumber
Next step: Remove the rod, re-tape the threads with pipe thread sealant rated for potable water, and retorque.
Continuous slow drip from the valve body itself, not just the discharge tube outlet
Likely cause: T&P relief valve body or threads leaking
Who should handle it: licensed plumber
Next step: Replace the T&P valve; do not attempt to reseal or tighten it beyond hand-plus-a-turn.
Dampness confined to the area around the upper access panel screws
Likely cause: Cracked upper access panel gasket (electric units)
Who should handle it: Homeowner, then licensed plumber
Next step: Reseat the gasket and panel; if the true source is a nipple or valve, address that instead.
Ten-minute homeowner checklist
- Dry both nipple fittings, wrap a folded paper towel around each, run a hot tap for two minutes, and inspect. (6 min · Towel, Paper towel)Overtightening can crack the nipple where it threads into the tank top.
- Dry around the anode hex bolt completely, watch for 10 minutes without running water, then run hot water for two minutes and recheck. (10 min · Towel, Flashlight)
- Dry the valve body and surrounding tank surface, place a dry cloth beneath the valve, and check after 15 minutes without touching the test lever. (10 min · Towel, Cloth)Never disable or cap a T&P valve, even a leaking one — replace it instead.
- With power off at the breaker, remove the upper panel, dry the insulation and gasket, reinstall, then run a hot cycle and check for renewed dampness. (10 min · Screwdriver, Towel)Always shut off power at the breaker before removing an access panel.
Never open an electrical panel, relight a burner you can smell gas near, or drain a tank that is scalding hot. Stop and call a licensed plumber instead.
What this costs to fix
| Cause | DIY cost | Professional cost | Typical time | Who should repair |
|---|---|---|---|---|
| Loose or corroded nipple fittings | $12–$45 | $150–$300 | 30–60 minutes | Homeowner or licensed plumber |
| Anode rod port leaking | $15–$40 | $120–$220 | 45–75 minutes | Homeowner or licensed plumber |
| T&P valve body leaking | $15–$25 (parts only) | $150–$300 | 45–60 minutes | Licensed plumber |
| Cracked upper access panel gasket | $5–$15 | $100–$180 | 20–30 minutes | Homeowner or electrician |
Loose or corroded nipple fittings
DIY cost: $12–$45
Professional cost: $150–$300
Typical time: 30–60 minutes
Who should repair: Homeowner or licensed plumber
Anode rod port leaking
DIY cost: $15–$40
Professional cost: $120–$220
Typical time: 45–75 minutes
Who should repair: Homeowner or licensed plumber
T&P valve body leaking
DIY cost: $15–$25 (parts only)
Professional cost: $150–$300
Typical time: 45–60 minutes
Who should repair: Licensed plumber
Cracked upper access panel gasket
DIY cost: $5–$15
Professional cost: $100–$180
Typical time: 20–30 minutes
Who should repair: Homeowner or electrician
Possible solutions you can do safely
- Tighten loose nipple union nuts a quarter turn with two wrenches.
- Re-tape and retorque the anode rod if the leak is at its hex head.
- Reseal the upper access panel gasket on electric units after element service.
- Replace a corroded flex connector rather than trying to reseal it.
Fixes that usually waste money
- Plumber's tape wrapped around a compression fitting — it seals metal-to-metal, not threads, and tape won't help.
- Replacing the entire tank for a top leak before checking the two nipples, the anode port, and the T&P valve first.
- Silicone caulk applied around a leaking T&P valve instead of replacing it.
When to Call a Professional
- The T&P valve body leaks continuously even when house pressure tests normal.
- You're not comfortable removing and resealing an anode rod under tank pressure.
- An electric unit's leak is near live wiring inside the access panel.
- Tightening fittings does not stop the leak after two attempts.
Related Home Problems
These water heater symptoms often show up with the one on this page.
why is my water heater leaking
Points at the same part of the system — both problems involve the corroded.
Leaks & Water Pressure Repair soon
why is my water heater leaking from the bottom
Points at the same part of the system — both problems involve the valve.
Leaks & Water Pressure Repair soon
why is my water heater leaking at the bottom
Points at the same part of the system — both problems involve the valve.
Leaks & Water Pressure Repair soon
why is my water heater leaking from the pressure valve
Points at the same part of the system — both problems involve the leak.
Leaks & Water Pressure Repair soon
why is my water heater relief valve leaking
Points at the same part of the system — both problems involve the discharge.
Leaks & Water Pressure Repair soon
Still not sure what you are hearing or seeing? Browse the leaks & water pressure guides or the full water heater guide index with repair-cost ranges.
Frequently Asked Questions
Does a leak from the top mean the tank is failing?
No. Top leaks are almost always from the hot/cold nipple fittings, the anode rod port, or the T&P valve — all repairable connections, not the tank body itself. Tank-body failures typically show up at the base, not the top.
How do I tell the anode rod leak apart from a nipple leak?
The anode rod port is a single hex-head bolt typically near the center of the tank top; nipple fittings are the two pipe connections at the edges where your hot and cold lines attach. Dry each area separately and watch which stays wet.
Can I fix a top leak myself?
Tightening a loose union or re-taping an anode rod's threads is within most homeowners' skill level with basic tools. Replacing a T&P valve should be handled by a licensed plumber since it's a code-required safety device.
Is a leaking T&P valve at the top dangerous?
A valve that's leaking because it's opening under real pressure is doing its job safely — the danger is if someone caps or disables it. A valve leaking at rest with normal house pressure has a worn seat or threads and should be replaced.
Sources
- U.S. Department of Energy — Water Heater Maintenance
- American Society of Mechanical Engineers (ASME) — Temperature and Pressure Relief Valve Requirements
Published 2026-08-10 · Last reviewed 2026-08-10 · Reviewed by Why Is My Water Heater? editorial team · How we research