
why is my water heater leaking
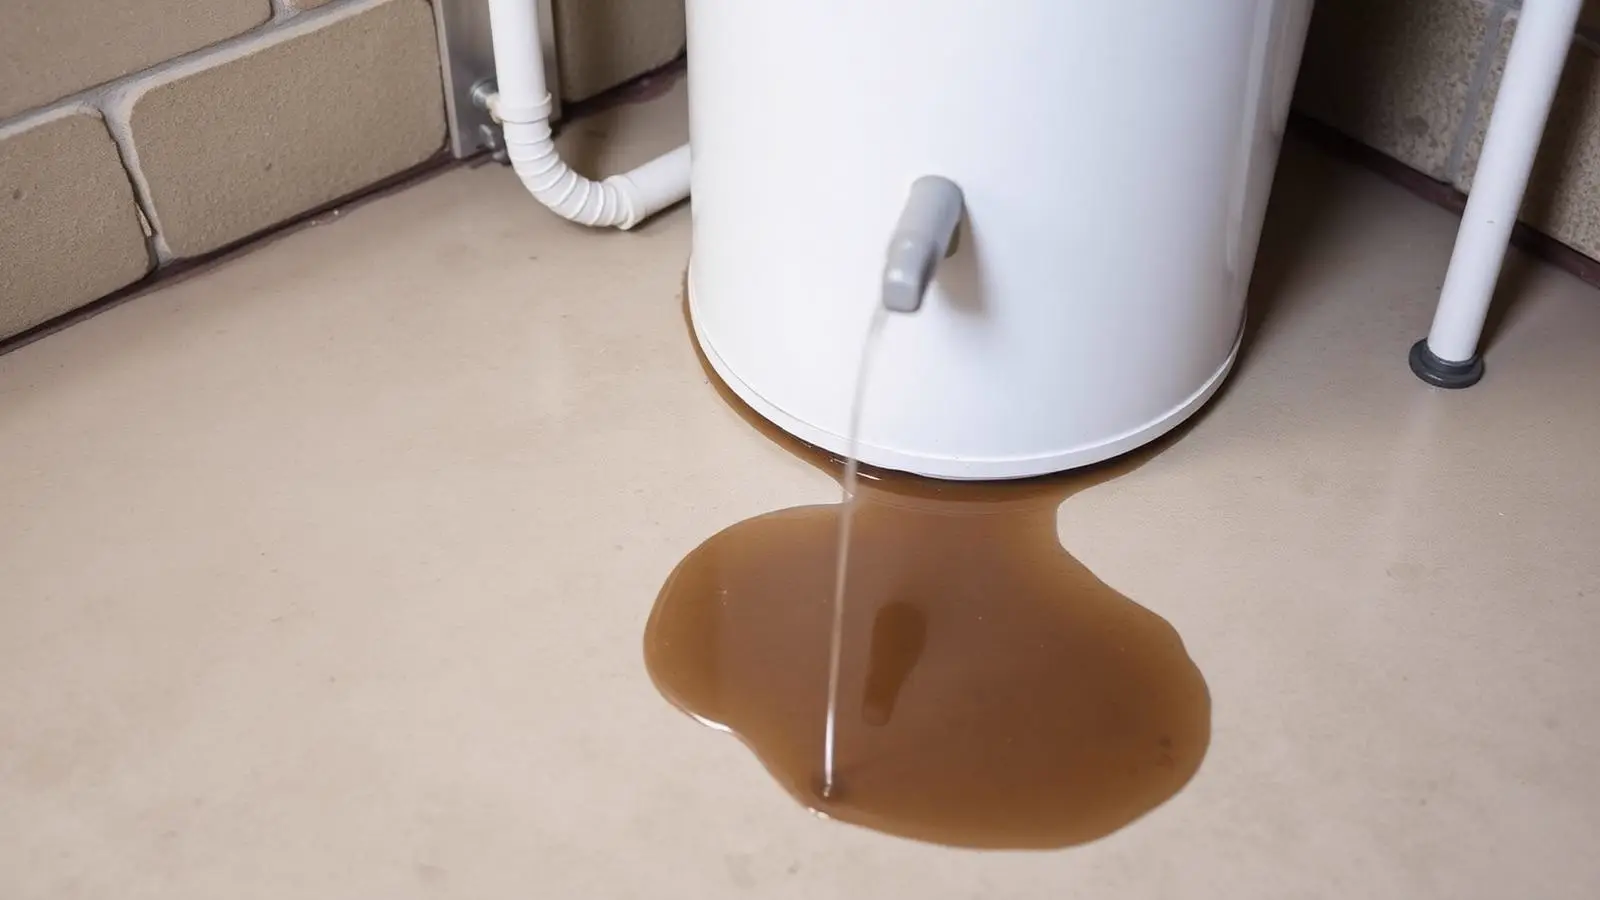
Causes, solutions and when to call a professional
Expert Answer
Most water heater leaks come from fittings, the drain valve, or the temperature and pressure relief valve — all repairable for $15 to $350. Water seeping from the tank bottom means internal corrosion, which cannot be repaired and requires replacement.
How Serious Is This?
Usually Manageable
Monitor it and run the safe checks below before spending money.
Inspection Recommended
Have a professional look at it soon to prevent damage or failure.
This is the level for this problem: Repair soon.
Potentially Serious
Stop using the appliance and get professional help right away.
Safety warning
Standing water plus electricity is a shock hazard. Shut off power at the breaker (electric) or set the gas control to OFF before touching a wet unit. If water is spraying or the tank is bulging, close the cold-water shutoff valve above the heater and leave the area.
Most Likely Causes
- 1Loose or corroded cold and hot water connections
- 2Temperature and pressure (T&P) relief valve discharging
- 3Failed drain valve
- 4Internal tank corrosion (tank failure)
- 5Condensation mistaken for a leak
Safe Homeowner Checks
Dry the top of the heater and both fittings with a towel.
Takes: 6 min · Tools: Towel, Toilet paper, Flashlight
Dry the top of the heater and both fittings with a towel. Wrap a single square of toilet paper around each connection, then run a hot tap for two minutes and check the paper.
Expect: The paper stays dry on a sound fitting and darkens within seconds on a weeping one.
What it means: Wet paper at a fitting means the leak is at the connection, not in the tank — a repair, not a replacement.
Next step: Tighten a union nut a quarter turn with two wrenches (one holding the nipple). If it still weeps, replace the flex connector.
Do not overtighten. Cracking a tank nipple turns a small drip into a full failure.
Screw a hose-bib gauge onto an outside spigot or laundry tap and read static pressure, then read it again right after the burner or elements have run.
Takes: 8 min · Tools: Water-pressure gauge ($12 hardware-store type)
Screw a hose-bib gauge onto an outside spigot or laundry tap and read static pressure, then read it again right after the burner or elements have run.
Expect: Static pressure between 40 and 80 psi with no more than a 10 psi rise after heating.
What it means: Over 80 psi, or a big jump after heating, means excess pressure or thermal expansion is opening the valve — the valve is not the fault.
Next step: Add or recharge a thermal-expansion tank and install a pressure-reducing valve if incoming pressure exceeds 80 psi.
Never cap, plug or bind the T&P discharge pipe. A blocked relief path is how water heaters rupture.
Dry the valve completely, thread a garden hose cap onto the outlet finger-tight, and watch the valve body and floor for 10 minutes.
Takes: 10 min · Tools: Towel, Brass garden-hose cap, Flashlight
Dry the valve completely, thread a garden hose cap onto the outlet finger-tight, and watch the valve body and floor for 10 minutes.
Expect: The floor stays dry with the cap installed.
What it means: Dry floor means the seat is leaking and the cap is holding it — a valve replacement. Still wet means the leak is above the valve.
Next step: Leave the cap on as a stopgap and schedule a brass ball-valve replacement.
Dry the floor, tape a sheet of white paper flat under the tank base, and check it after an hour of normal hot-water use.
Takes: 5 min · Tools: Towel, White paper, Tape
Dry the floor, tape a sheet of white paper flat under the tank base, and check it after an hour of normal hot-water use.
Expect: Paper stays clean and dry if the base is sound.
What it means: Rust-stained wet spots under the center of the base, with dry fittings above, indicate the tank itself has perforated.
Next step: Shut the cold-water supply, turn off power or gas, and get replacement quotes. A perforated tank cannot be patched.
A corroded tank can fail suddenly and dump 40–80 gallons. Do not delay if the leak rate is increasing.
Wipe the tank fully dry, do not run hot water for one hour, and check the surface and floor again.
Takes: 5 min · Tools: Towel
Wipe the tank fully dry, do not run hot water for one hour, and check the surface and floor again.
Expect: A condensation-only tank stays dry after an hour of no use.
What it means: Dry after rest means condensation, not a leak. Water returning without any use means a real leak.
Next step: Improve basement ventilation or dehumidify; no repair is needed.
Water under a heater is not always a tank failure. The first job is finding the source, because a $20 drain-valve cap and a $1,500 tank replacement look identical on the floor. Dry everything, put down paper towels, and work down the list below from the most common cause to the least.
Every likely cause, ranked
- #1
Loose or corroded cold and hot water connections
Most common causeThe threaded nipples at the top of the tank expand and contract with every heating cycle. Over years, that movement loosens the union nuts and flex-connector fittings, and dissimilar metals (copper against a steel nipple without a dielectric union) corrode until the joint weeps.
It is the cheapest and most common leak point, and gravity pulls the water down the side of the tank, which makes it look like the tank itself is leaking.
Exact symptoms
- Water trail running down the outside of the tank from the top
- Green or white crust on copper or brass fittings
- Top of the jacket is damp but the floor under the center of the tank is dry
Self-test (6 min) — tools: Towel, Toilet paper, Flashlight
Dry the top of the heater and both fittings with a towel. Wrap a single square of toilet paper around each connection, then run a hot tap for two minutes and check the paper.
Expect: The paper stays dry on a sound fitting and darkens within seconds on a weeping one.
What it means: Wet paper at a fitting means the leak is at the connection, not in the tank — a repair, not a replacement.
Next step: Tighten a union nut a quarter turn with two wrenches (one holding the nipple). If it still weeps, replace the flex connector.
Do not overtighten. Cracking a tank nipple turns a small drip into a full failure.
DIY-eligible · DIY $12–$45 for a braided flex connector or dielectric union · Pro $150–$300 · 30–60 minutes
- #2
Temperature and pressure (T&P) relief valve discharging
The T&P valve is a safety device required to open at 210 °F or 150 psi. Thermal expansion in a closed plumbing system, a failed expansion tank, or a thermostat set too high pushes pressure past that limit and the valve dumps water down the discharge pipe exactly as designed.
Homeowners see water at the end of the discharge tube near the floor and assume the tank split. In most cases the valve is doing its job and the real problem is pressure.
Exact symptoms
- Water only at the bottom of the discharge pipe, tank dry elsewhere
- Release happens after a long heating cycle, then stops
- Popping or rushing sound from the valve when it opens
Self-test (8 min) — tools: Water-pressure gauge ($12 hardware-store type)
Screw a hose-bib gauge onto an outside spigot or laundry tap and read static pressure, then read it again right after the burner or elements have run.
Expect: Static pressure between 40 and 80 psi with no more than a 10 psi rise after heating.
What it means: Over 80 psi, or a big jump after heating, means excess pressure or thermal expansion is opening the valve — the valve is not the fault.
Next step: Add or recharge a thermal-expansion tank and install a pressure-reducing valve if incoming pressure exceeds 80 psi.
Never cap, plug or bind the T&P discharge pipe. A blocked relief path is how water heaters rupture.
Professional repair · DIY $15 gauge to diagnose · Pro $175–$450 for an expansion tank or pressure-reducing valve · 1–2 hours
- #3
Failed drain valve
Most tanks ship with a plastic drain valve. Sediment lodges in the seat after a flush, and the plastic body warps from heat, so the valve never seals fully again.
It sits at the very bottom of the tank, so any drip lands on the floor near the center — the exact place people look for a tank failure.
Exact symptoms
- Slow drip from the spigot itself
- Wet patch directly below the valve, dry behind the tank
- Started shortly after the tank was flushed
Self-test (10 min) — tools: Towel, Brass garden-hose cap, Flashlight
Dry the valve completely, thread a garden hose cap onto the outlet finger-tight, and watch the valve body and floor for 10 minutes.
Expect: The floor stays dry with the cap installed.
What it means: Dry floor means the seat is leaking and the cap is holding it — a valve replacement. Still wet means the leak is above the valve.
Next step: Leave the cap on as a stopgap and schedule a brass ball-valve replacement.
DIY-eligible · DIY $8 hose cap, $20–$35 for a brass replacement valve · Pro $150–$250 · 45 minutes
- #4
Internal tank corrosion (tank failure)
The steel tank is protected by a glass lining and a sacrificial anode rod. Once the anode is consumed — typically in three to five years on untreated water, faster on softened water — the lining's small flaws let water reach bare steel and rust through from the inside.
On a heater older than eight to twelve years with no other visible leak point, corrosion is the default explanation.
Exact symptoms
- Water appears from under the jacket at the base and returns after every cleanup
- Rusty or brown tint to the leaked water
- Heater is 8+ years old
Self-test (5 min) — tools: Towel, White paper, Tape
Dry the floor, tape a sheet of white paper flat under the tank base, and check it after an hour of normal hot-water use.
Expect: Paper stays clean and dry if the base is sound.
What it means: Rust-stained wet spots under the center of the base, with dry fittings above, indicate the tank itself has perforated.
Next step: Shut the cold-water supply, turn off power or gas, and get replacement quotes. A perforated tank cannot be patched.
A corroded tank can fail suddenly and dump 40–80 gallons. Do not delay if the leak rate is increasing.
Professional repair · DIY Not repairable · Pro $1,200–$2,500 installed replacement · 3–5 hours
- #5
Condensation mistaken for a leak
Cold incoming water chills the tank wall below the dew point of the surrounding air. In a humid basement or after a very large hot-water draw, moisture condenses on the jacket and drips onto the floor.
It is common on new heaters, in summer, and in unconditioned basements — and it disappears on its own once the tank is back up to temperature.
Exact symptoms
- Fine, even droplets over the whole tank surface rather than one trail
- Only appears after heavy hot-water use or on humid days
- Water is clear with no rust and never returns overnight
Self-test (5 min) — tools: Towel
Wipe the tank fully dry, do not run hot water for one hour, and check the surface and floor again.
Expect: A condensation-only tank stays dry after an hour of no use.
What it means: Dry after rest means condensation, not a leak. Water returning without any use means a real leak.
Next step: Improve basement ventilation or dehumidify; no repair is needed.
DIY-eligible · DIY $0 · Pro $0 · None
Symptom-to-cause table
Match what you can see, hear or smell to the cause it points at, and the safe next step for that reading.
Water trail running down the outside of the tank from the top
Likely cause: Loose or corroded cold and hot water connections
Who should handle it: Homeowner, then licensed plumber
Next step: Tighten a union nut a quarter turn with two wrenches (one holding the nipple). If it still weeps, replace the flex connector.
Water only at the bottom of the discharge pipe, tank dry elsewhere
Likely cause: Temperature and pressure (T&P) relief valve discharging
Who should handle it: licensed plumber
Next step: Add or recharge a thermal-expansion tank and install a pressure-reducing valve if incoming pressure exceeds 80 psi.
Slow drip from the spigot itself
Likely cause: Failed drain valve
Who should handle it: Homeowner, then licensed plumber
Next step: Leave the cap on as a stopgap and schedule a brass ball-valve replacement.
Water appears from under the jacket at the base and returns after every cleanup
Likely cause: Internal tank corrosion (tank failure)
Who should handle it: licensed plumber
Next step: Shut the cold-water supply, turn off power or gas, and get replacement quotes. A perforated tank cannot be patched.
Fine, even droplets over the whole tank surface rather than one trail
Likely cause: Condensation mistaken for a leak
Who should handle it: Homeowner, then licensed plumber
Next step: Improve basement ventilation or dehumidify; no repair is needed.
Ten-minute homeowner checklist
- Dry the top of the heater and both fittings with a towel. (6 min · Towel, Toilet paper, Flashlight)Do not overtighten. Cracking a tank nipple turns a small drip into a full failure.
- Screw a hose-bib gauge onto an outside spigot or laundry tap and read static pressure, then read it again right after the burner or elements have run. (8 min · Water-pressure gauge ($12 hardware-store type))Never cap, plug or bind the T&P discharge pipe. A blocked relief path is how water heaters rupture.
- Dry the valve completely, thread a garden hose cap onto the outlet finger-tight, and watch the valve body and floor for 10 minutes. (10 min · Towel, Brass garden-hose cap, Flashlight)
- Dry the floor, tape a sheet of white paper flat under the tank base, and check it after an hour of normal hot-water use. (5 min · Towel, White paper, Tape)A corroded tank can fail suddenly and dump 40–80 gallons. Do not delay if the leak rate is increasing.
- Wipe the tank fully dry, do not run hot water for one hour, and check the surface and floor again. (5 min · Towel)
Never open an electrical panel, relight a burner you can smell gas near, or drain a tank that is scalding hot. Stop and call a licensed plumber instead.
What this costs to fix
| Cause | DIY cost | Professional cost | Typical time | Who should repair |
|---|---|---|---|---|
| Loose or corroded water connections | $12–$45 | $150–$300 | 30–60 minutes | Homeowner or licensed plumber |
| T&P valve discharging from excess pressure | $15 gauge | $175–$450 | 1–2 hours | Licensed plumber |
| Failed drain valve | $20–$35 | $150–$250 | 45 minutes | Homeowner or licensed plumber |
| Internal tank corrosion | Not repairable | $1,200–$2,500 | 3–5 hours | Licensed plumber |
| Condensation | $0 | $0 | None | Homeowner |
Loose or corroded water connections
DIY cost: $12–$45
Professional cost: $150–$300
Typical time: 30–60 minutes
Who should repair: Homeowner or licensed plumber
T&P valve discharging from excess pressure
DIY cost: $15 gauge
Professional cost: $175–$450
Typical time: 1–2 hours
Who should repair: Licensed plumber
Failed drain valve
DIY cost: $20–$35
Professional cost: $150–$250
Typical time: 45 minutes
Who should repair: Homeowner or licensed plumber
Internal tank corrosion
DIY cost: Not repairable
Professional cost: $1,200–$2,500
Typical time: 3–5 hours
Who should repair: Licensed plumber
Condensation
DIY cost: $0
Professional cost: $0
Typical time: None
Who should repair: Homeowner
Possible solutions you can do safely
- Tighten union nuts a quarter turn with two wrenches while backing up the tank nipple.
- Replace a weeping braided flex connector ($12–$45) after shutting the cold-water valve.
- Cap a dripping drain valve with a brass hose cap as a same-day stopgap.
- Swap a plastic drain valve for a brass ball-valve type once the tank is drained.
- Lower the thermostat to 120 °F to cut thermal expansion and scald risk.
Fixes that usually waste money
- Epoxy, JB Weld or tank patch kits on a perforated tank — the steel around the hole is already thin.
- Replacing a T&P valve that is opening because house pressure is above 80 psi; the new valve will open too.
- Plumber's tape on a compression or flare fitting, which seals on the metal face, not the threads.
- A full tank replacement before confirming the leak isn't a $20 fitting.
When to Call a Professional
- Water is coming from under the tank base and returns after cleanup.
- House static pressure reads above 80 psi or spikes after heating.
- The T&P valve reopens after replacement or discharges continuously.
- The heater is gas-fired and the leak has soaked the burner compartment or vent.
- Any leak near electrical connections, the junction box, or a wet floor with a live circuit.
Related Home Problems
These water heater symptoms often show up with the one on this page.
why is my water heater leaking water
Points at the same part of the system — both problems involve the corroded.
Leaks & Water Pressure Repair soon
why is my water heater leaking from the top
Points at the same part of the system — both problems involve the corroded.
Leaks & Water Pressure Repair soon
why is my water heater leaking from the bottom
Points at the same part of the system — both problems involve the drain.
Leaks & Water Pressure Repair soon
why is my water heater leaking from the drain valve
Points at the same part of the system — both problems involve the after.
Leaks & Water Pressure Usually safe to investigate
why is my water heater dripping
Points at the same part of the system — both problems involve the condensation.
Leaks & Water Pressure Usually safe to investigate
Still not sure what you are hearing or seeing? Browse the leaks & water pressure guides or the full water heater guide index with repair-cost ranges.
Frequently Asked Questions
Can a leaking water heater explode?
A leak itself relieves pressure, so a dripping tank is unlikely to burst. The real explosion risk is a blocked or capped temperature and pressure relief valve, which lets pressure build with no escape path. Never plug the T&P valve or its discharge pipe.
How long can I leave a leaking water heater?
A fitting or drain-valve drip can wait days for a scheduled repair if you keep the area dry. A leak from the tank base should be shut off the same day, because corroded tanks fail progressively and can release the full 40–80 gallon contents at once.
Is it worth repairing or should I replace it?
Repair valves, fittings and connectors at any age — they run $150–$450 installed. Replace when the tank body itself leaks, or when the unit is over ten years old and the repair quote exceeds about half the $1,200–$2,500 replacement cost.
How do I shut off a leaking water heater?
Turn the gas control knob to OFF, or switch off the water-heater breaker for an electric unit. Then close the cold-water shutoff valve on the pipe entering the top of the tank. Leave the hot tap open to relieve pressure before any work.
Sources
- U.S. Department of Energy — Water Heating — Storage Water Heaters and Maintenance
- International Code Council — International Plumbing Code, Section 504 — Relief Valves and Discharge Piping
- U.S. Environmental Protection Agency — WaterSense — Fixing Household Leaks
Published 2026-08-10 · Last reviewed 2026-08-10 · Reviewed by Why Is My Water Heater? editorial team · How we research